
Article

A Step By Step Guide to Our New Filtering Feature (Part 2)
TimeTap TeamReady for Part 2? Because today we're going to show you how to create your own Staff Filters! If you haven't kept up with us lately, we recently released our new Business Plan that provides you with several new features to enhance your clients' and or students' online scheduling experience, and in-turn grow your business.
If you'd like a brief explanation of the powerful tools that the Business Plan includes, follow the link and you'll also find helpful tutorials for those new features.
Now on to Staff Filters! But wait, why should my business use them?
Why Use Staff Filters?
Our staff filtering feature actually provides you more freedom in determining how your clients will be able to search for the person that he or she wants to work with. By making their online scheduling experience simpler and with lesser steps to completing their appointment or sign-up, you may actually make their day and they will likely refer your business to a friend or family member.
As one of the greatest benefits, your clients won't have to scroll through a list of staff members to find someone who might be able to assist them. In several clicks or fewer, they can pull up the staff member's name and profile.
Here's how you can set them up.
How to Create Staff Filters for Faster Online Booking in 8 Easy Steps
Reduce the number of phone and email inquiries for your staff members' services or classes with this handy feature. In this tutorial, we'll be using the scenario of a medical practice with physicians as staff members.
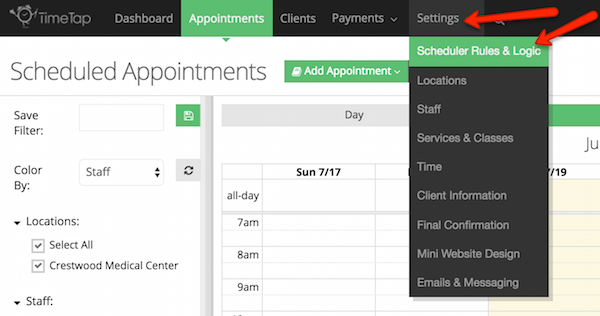
➤ Step 1 - First, make sure that you're signed in to TimeTap's BackOffice, and then go to "Settings" > "Scheduler Rules & Logic".

➤ Step 2 - Next, click the "Edit" button.


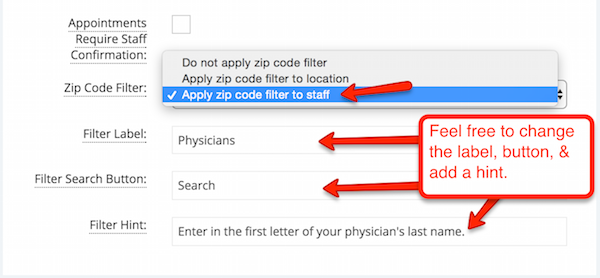
➤ Step 3 - Then you'll be able to edit your Filter's Label, the Search Button Text, and add a Filter Hint if you would like to. Once you're happy with your settings, click the "Save" button.

➤ Step 4 - Now go to "Settings" and click on the "Staff" tab.

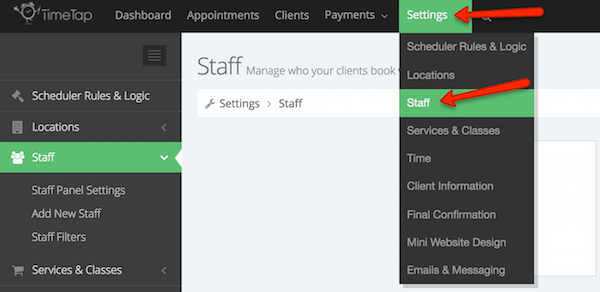
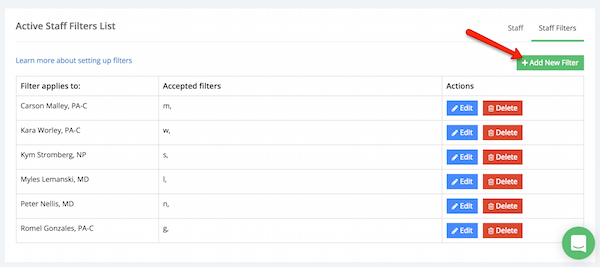
➤ Step 5 - Click on the "Staff Filters" tab

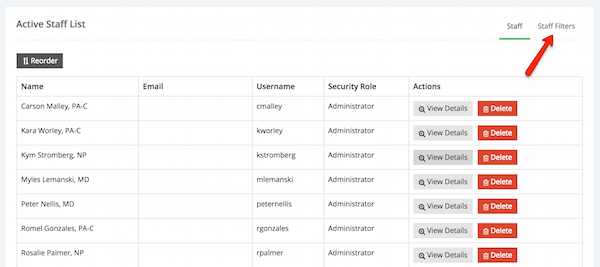
➤ Step 6 - Click on the "Add New Filter" button.
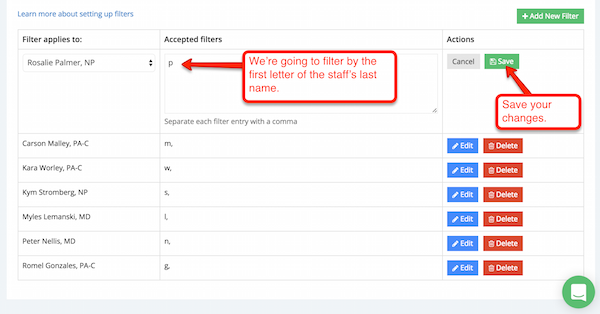
➤ Step 7 - Enter in the filter criteria that you'll accept when patients search for a staff member. *I've chosen to allow patients to search for medical staff by the first letter of their last names. Once you've entered those, click "Save".

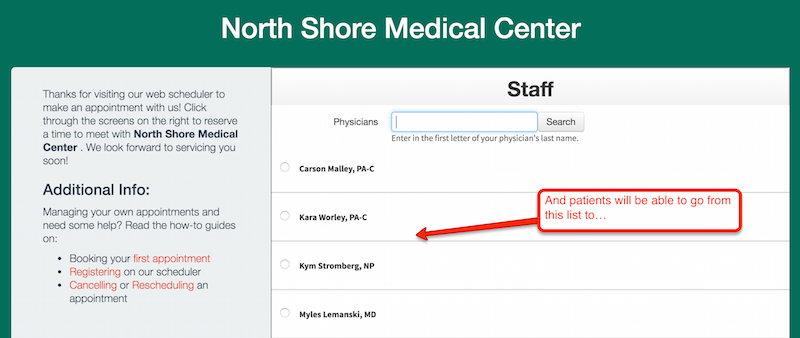
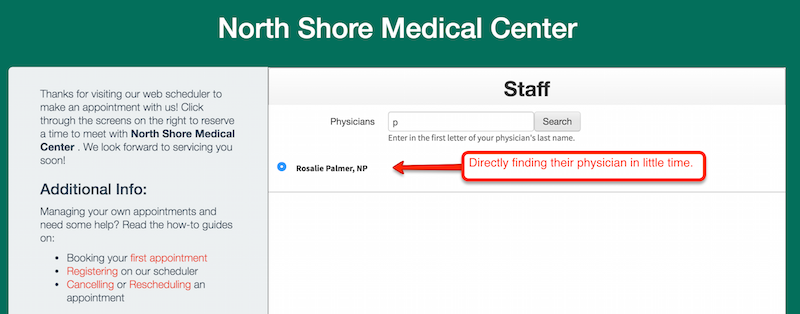
➤ Step 8 - Lastly, preview your web scheduler and once you're on the Staff screen you'll see a list of staff members & the option for patients to filter by the first letter of their last names.

And your patients will be able to avoid scrolling through a list and searching by the criteria that you have set instead. The hint provides them with a tip for your search criteria.

Allowing patients to filter staff members by the first letter of their last name isn't the only way to use staff filters. Three other criteria that your clients could use to filter staff members might include:
- By certification
- By specialty
- By training
Or another way that you might think of. Don't limit your clients to a list, but instead allow them to search and more easily find their staff-person of choice.
Thought this post was insightful? Feel free to share with colleagues or friends to help them keep their clients happy & grow their business by clicking the button below.
For now, happy filtering!