
Article

Feature Focus: Manage Payments and Invoices for Your Appointments
TimeTap TeamStart accepting service payments
Do you offer services to your clients that request or require payment? If so, then this feature is for you.
Allow clients to book appointments with you and pay for your services in as easy as several steps. By choosing an online payment processor, you can easily manage your payment settings, manage appointment invoices, apply charges, apply credits, write off amounts, and enter in client payments. Here’s why you should take payments for appointments:
Reduce Appointment No-Shows
Prevent appointment no-shows that take away from the valuable time that you have by allowing clients to pay up front for your services. As an attorney or tax preparer, you can prevent valuable time loss by having clients pay up front for your legal and tax services to secure their appointments with you.
Prevent appointment no-shows & reduce hassle at the time of payment
No Hassle Over Payment at Time of Appointment
Reduce the hassle of accepting payment in the proper form at the time of appointment by accepting payment online. You won’t have to be concerned with processing cash, checks, cards, or other forms of payment on-site that could also slow down business, but instead serve your clients and allow them to return to their daily schedules.
Allow Clients to Enter Coupon Codes for Specials
Have coupon codes that new or returning clients can enter? How about specials for referrals? Allow you clients to enter in coupon codes for your services no matter whether you’re offering a free weekly deal or discounted item.
Export Your Invoices
Keep track of appointment invoice details by exporting a list of the information you need such as the invoice/payment number, invoice date, amount paid, amount due, the current balance, and more.
Have Payments Processed Internationally
Do you need a particular currency formatting? Not a problem, let us know the formatting you need and we’ll take care of it for you.
And if you don’t require clients to pay for your services up front or at all, you can arrange your payment settings to reflect this. We’re going to walk you through some of the basic functions of our new feature that will hopefully open more doors for your business.
How to Add a Payment Portal
- First let's add a Payment Portal to your account. To do this, log in to TimeTap and follow these steps:
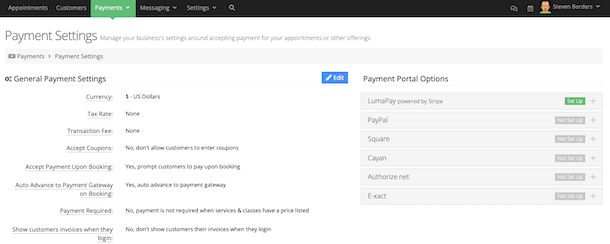
- Click on the “Payments” tab > click “Payment Settings”
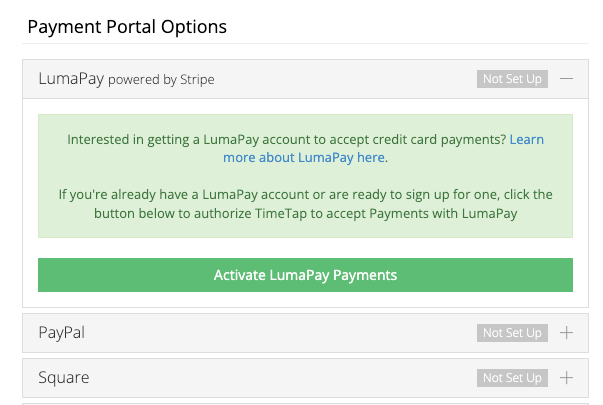
- On the Payment Setting page > click on a Payment Portal to set up. You can choose LumaPay or other Payment providers.

Once you’ve clicked on the Payment Portal of your choice (let’s use PayPal for this example), click the “Activate PayPal Payments” button *you’ll do the same for other portals
Click the "Activate PayPal Payments" button

To activate this portal, you’ll need to enter in your Merchant ID from your PayPal account. To find this ID, check under the Business Settings of your PayPal account.
For the PayPal Payment Portal, enter in your Merchant ID and click "Save"
Once you’ve entered your Merchant ID, click the “Save” button and now you’re ready to accept payments. *If you've chosen to require payments for your services, clients will be able to click on the payment button at the end of your scheduler's flow to secure their appointment with you:
Clients can submit payment to secure appointments with you.
How to Adjust General Payment Settings
Click on the “Edit” button under the General Payment Settings section. Adjust your General Payment Settings by clicking the "Edit" button.
Choose whether or not you would like to do the following:
- Allow clients to enter in coupons by toggling this option “On” or “Off”
- Require clients to submit payment for their appointments by toggling this option “On” or “Off”
- Set a redirect URL after clients submit their payment through PayPal
- Adjust how you would like for your appointment invoice description to be set
- Add or remove manual invoice payment methods
- Edit the confirmation message that clients will see once they’ve finished booking an appointment with you
How to Create an Invoice
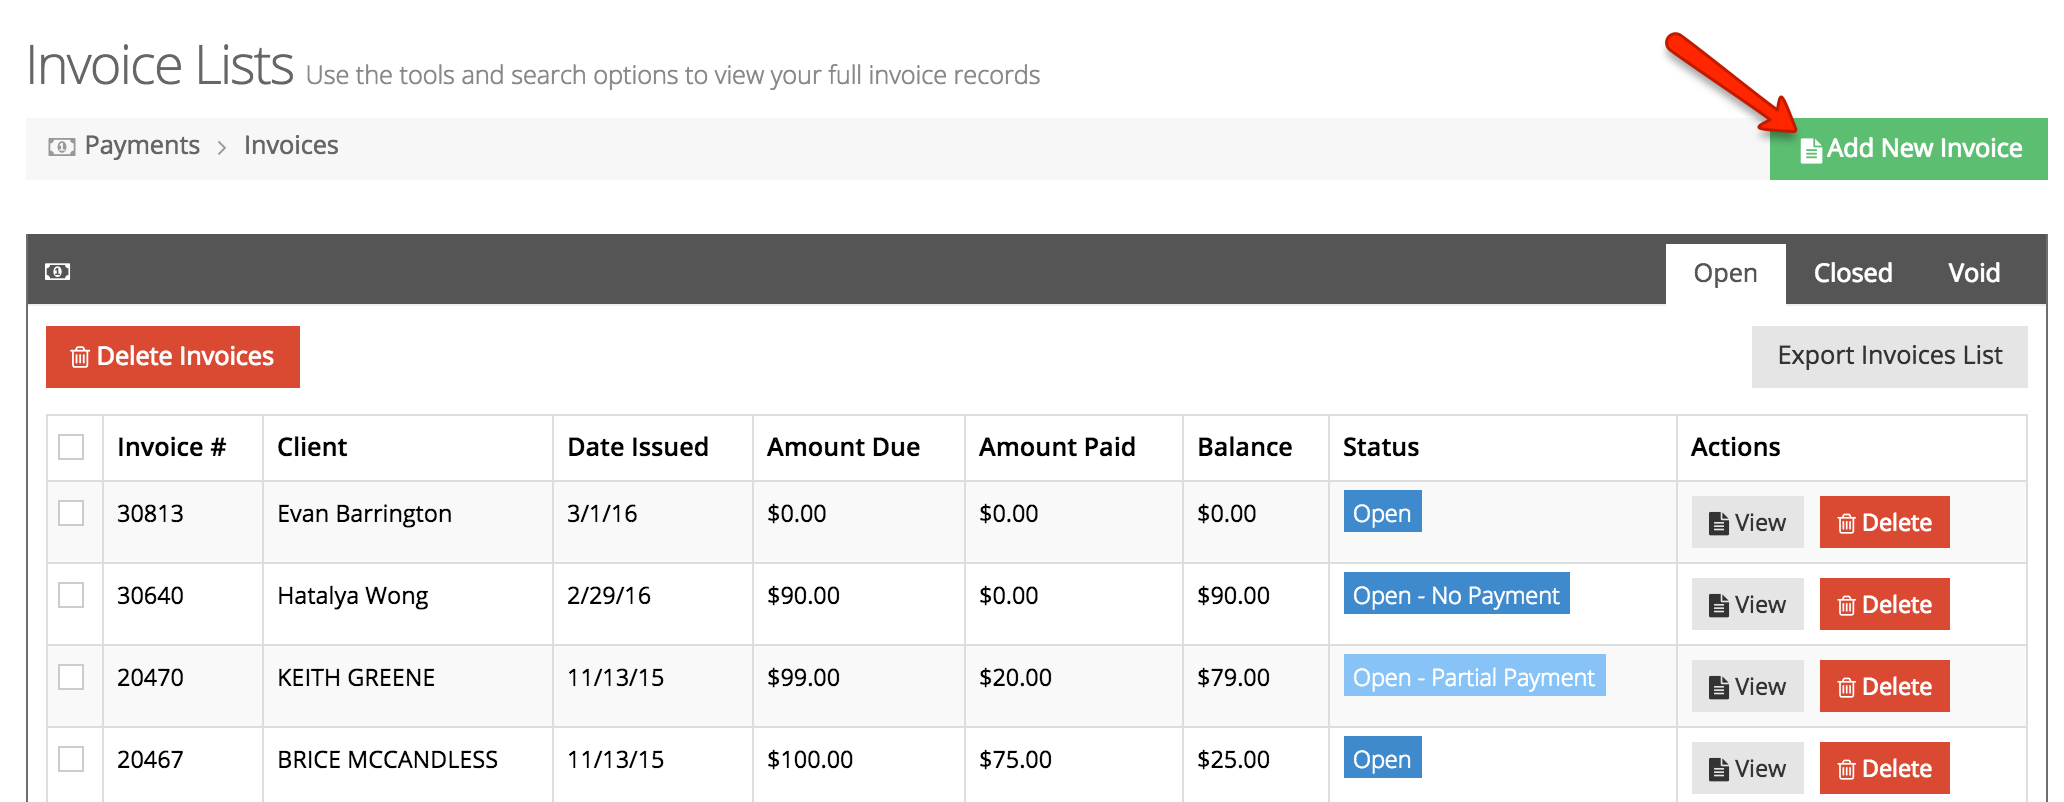
To create your first invoice from the Payment Settings screen, click on the “Invoices” tab on the left-hand side of the page and that will open up the Invoice Lists page.
Click the “Add New Invoice” button in the upper right-hand corner.

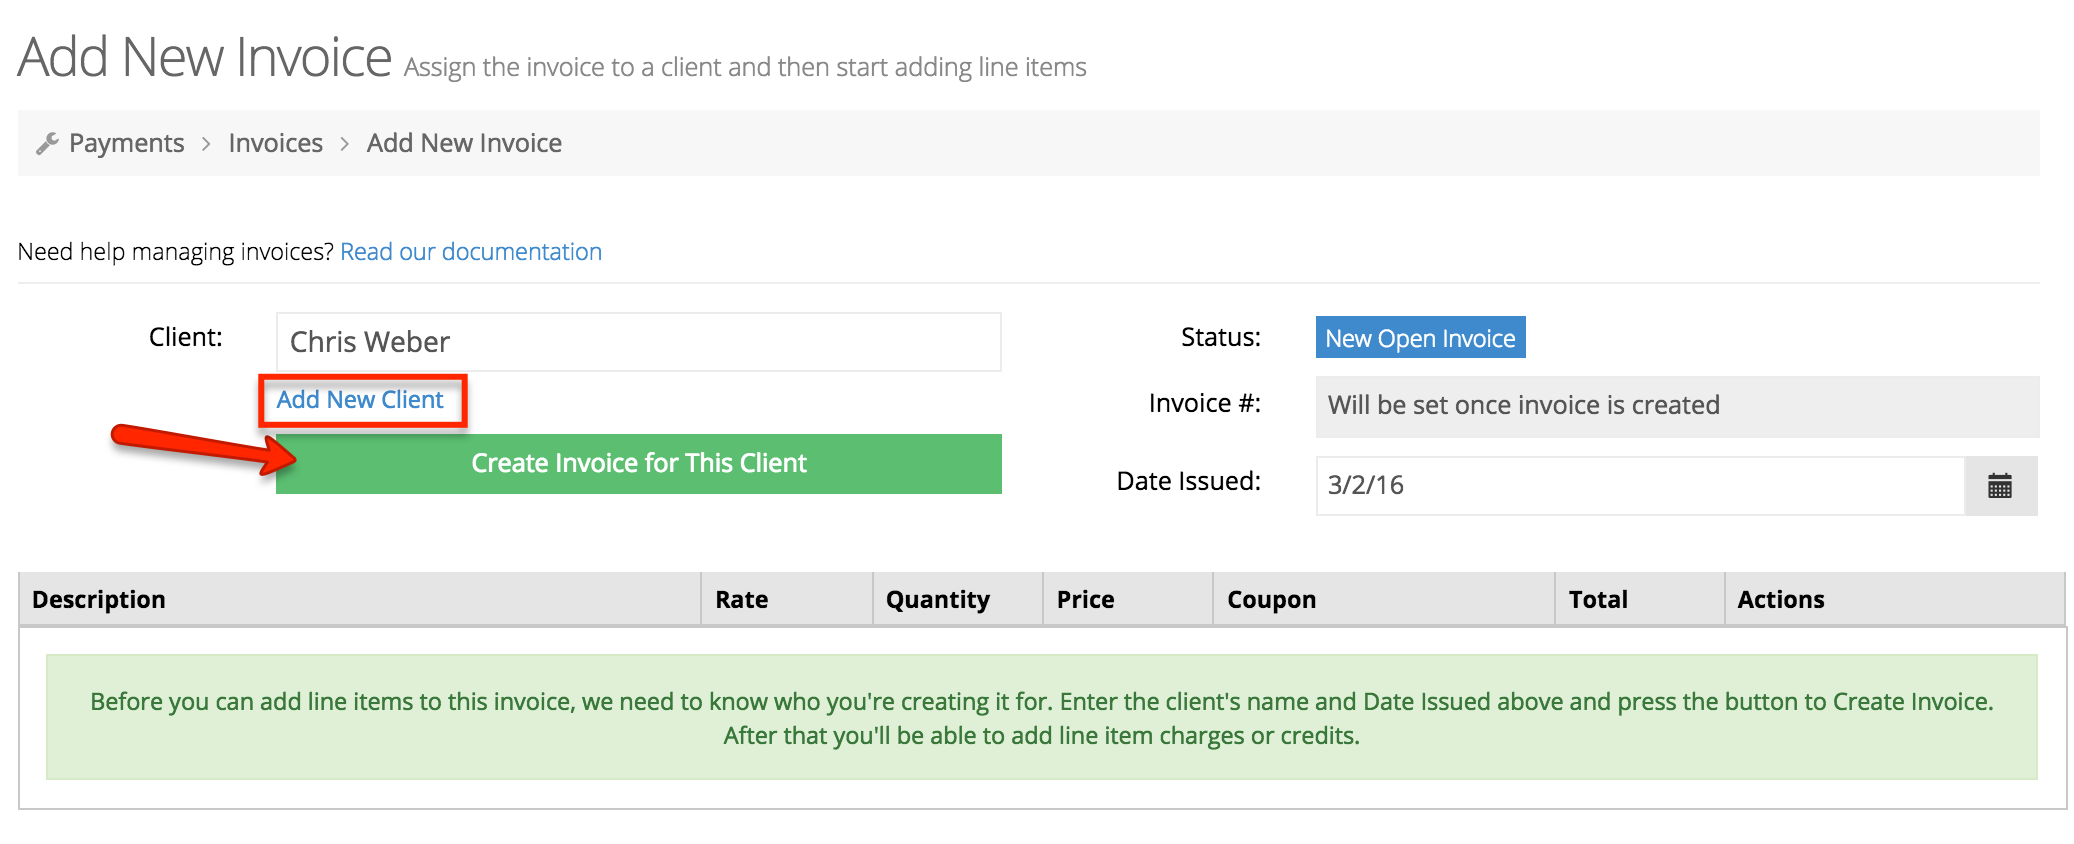
Search for a client who has already booked an appointment with you, or add a new client, and then click the “Create Invoice for This Client” button

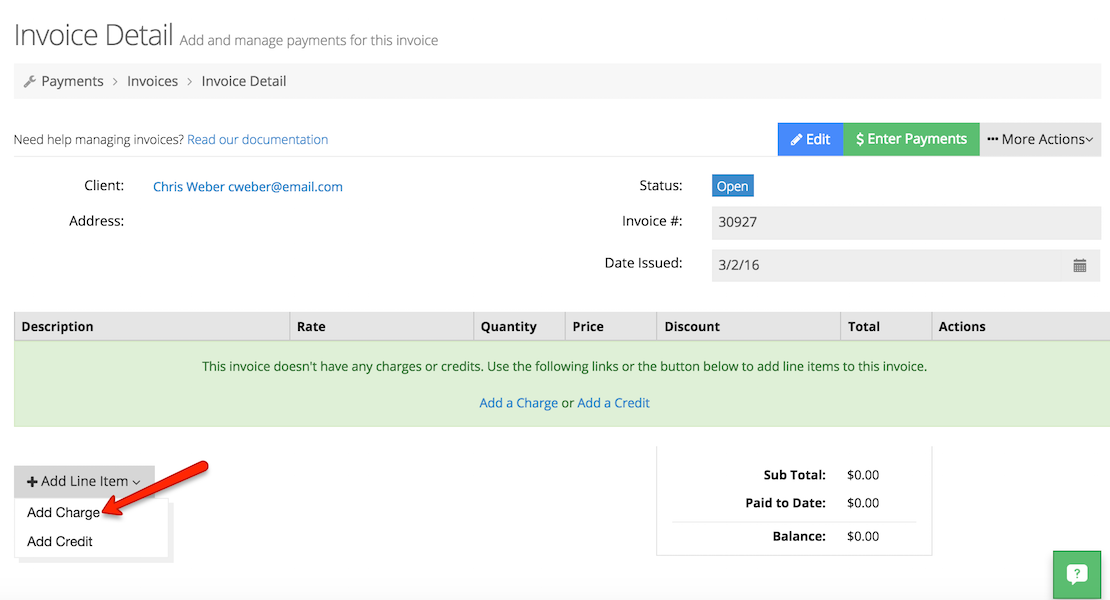
How to Add Line Item Charges
To add a line item charge, simply click the “Add Line Item” button > “Add Charge.” Then, add a new charge to client's invoice.

To add a new charge, click the “Add New Charge” button > enter in the Description > Unit Cost > Quanity > Discount Amount (if any) > and then click the “Add Charge(s)” button.
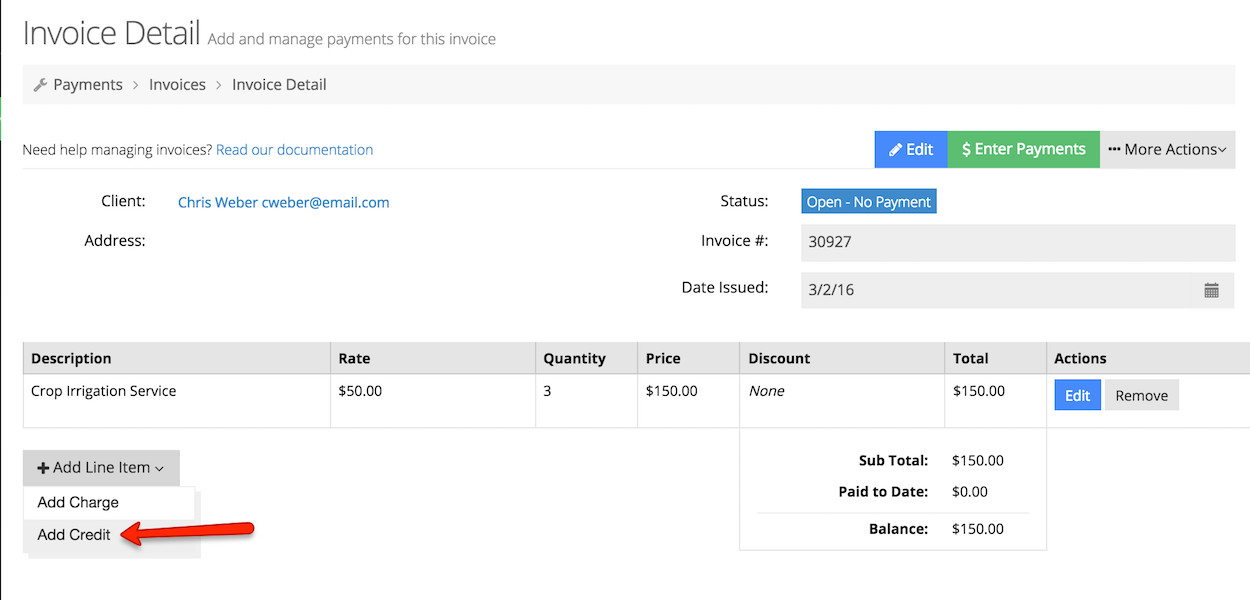
How to Add Line Item Credits
To add line item credits in the event of client saving money on a deal with you, simply click the “Add Line Item” button > “Add Credit”

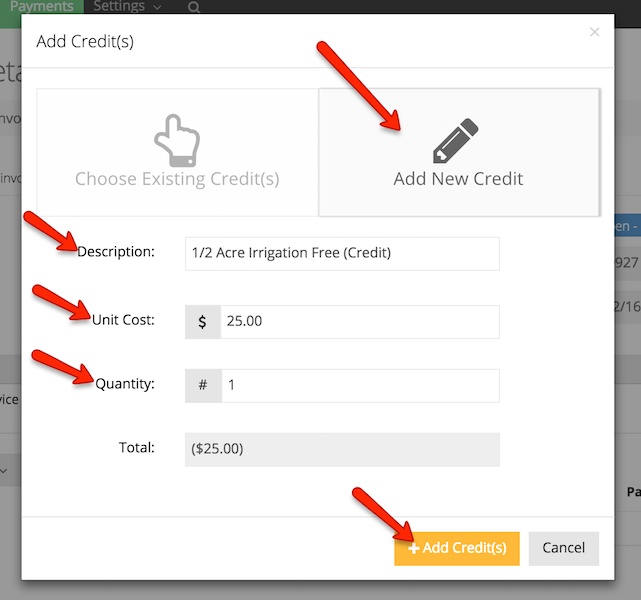
To add a new credit, click the “Add New Credit button > enter in the Description > Unit Cost > Quantity > and then click the “Add Credit(s)” button

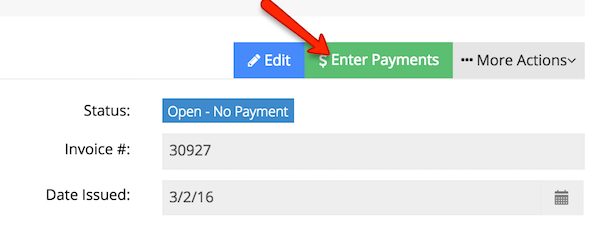
How to Enter Payments
Now that we can see the new charge, credit, and current balance on the client's invoice, let's add a payment.

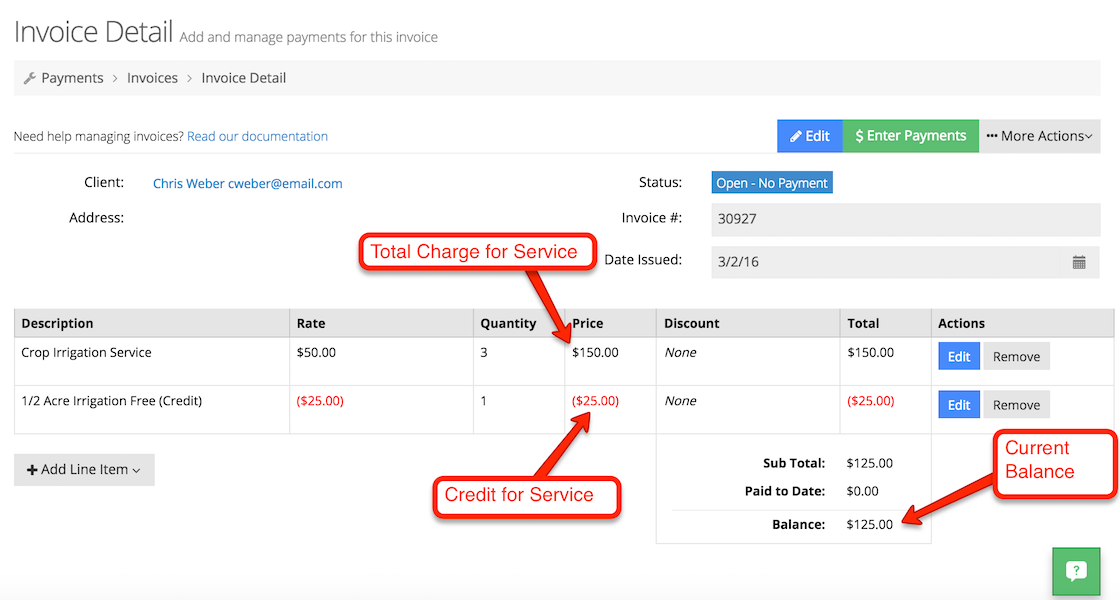
View the current charge, credit, and balance on the client's invoice. To enter payments, click the “Enter Payments” button.

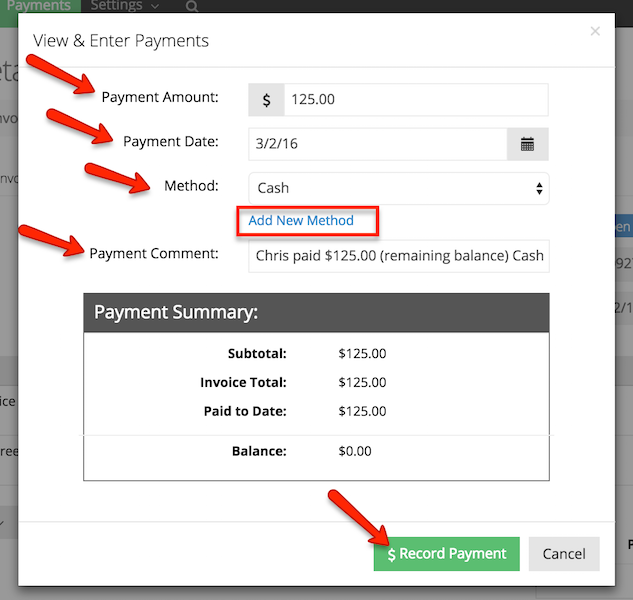
Type in the Payment Amount > Payment Date > choose or add a Method > enter in a Payment Comment

And those are the basics of accepting and managing payments with our new feature. Don’t waste time, save it by giving your clients the option to pay for their services upfront, and also reduce the number of no-shows that hurt your business’ revenue. So what are you waiting for? Get started accepting appointments reduce the number of no-shows that hurt your business’ revenue. So what are you waiting for? Sign up with us to start taking appointments and service payments today to help you with growing your business!