
Article

Breaking the Mold With Our New Course Feature
TimeTap TeamEver had something you really wanted to do that would have required you to step outside of your comfort zone? Ever wanted to try spearheading a project, co-managing an organization, or helping people battle diseases? Whatever your goal, it would have required you to move into a new situation and re-adjust. Maybe your business helps clients or students break past barriers while working towards their goals. If this is true and your business offers some type of course or set of classes that they can take en route to reaching their goals, today’s post can help you help them break their molds with our new course feature.
Quick Bits on the Course Feature
With this feature, a course is a reason that your clients or students are booking with you. You can create sets for your course (such as for different seasons of the year, days of the week, or even locations). For each set, you’ll have sessions that your attendees will automatically be signed up for if they book your course and a certain set.
- Provide a course description
- Choose your rescheduling option
- Set up a screening question (optional - learn how to set them up here)
- Make a course private to avoid showing on your main web scheduler
Step-by-Step Walkthrough
Let’s say that your job is to help advise students who seek to provide patient care. These students have decided that this is the career path that they want to take and have stepped outside of their comfort zones by embarking on this academic journey in pursuit of their goals.
Before these students are able to provide care to patients in a hospital or care facility, they first need to obtain their Certified Nursing Assistant Certification. You can set up a course for this certification as your first step.
1. Under “Settings” > “Services & Classes”, click on the “Add New Course” button

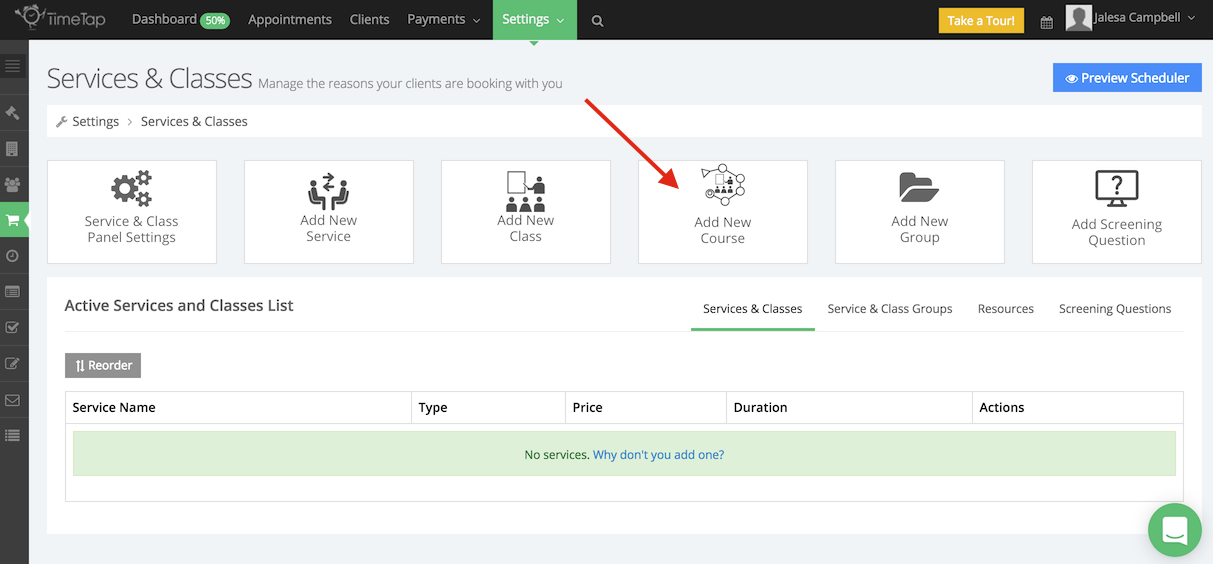
Click on the "Add New Course" button
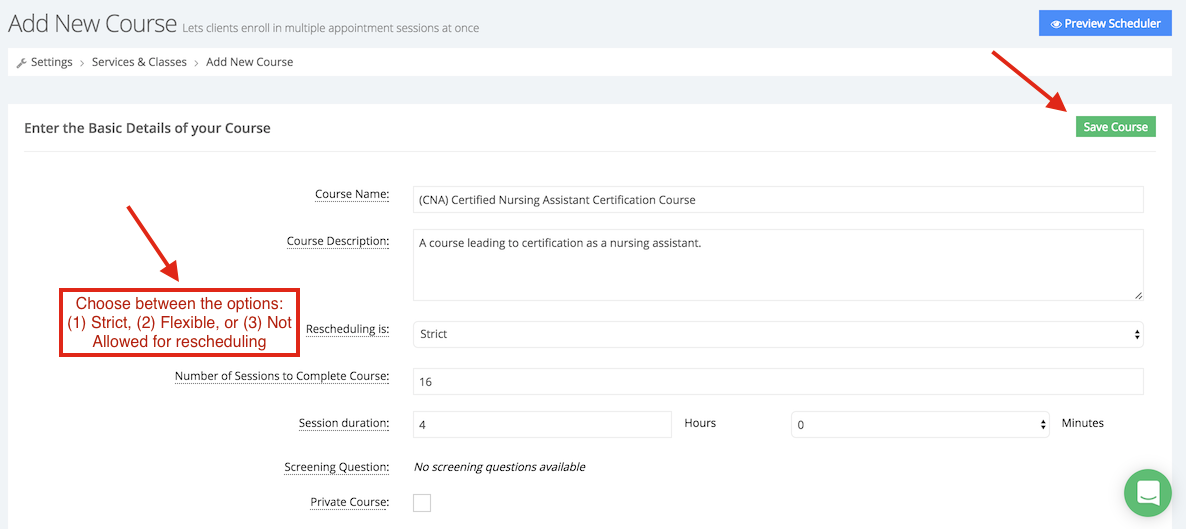
2. Fill in/select the following information about your course:
- Name
- Description
- Rescheduling option* (see notes below)
- Number of sessions to complete the course
- Session duration
- Screening questions
- Private course option (for when you only allow certain clients/students to see this course through its URL or a staff member books the course for them)
Notes: With the rescheduling option, you can choose from:
- Strict
- Flexible
- Not Allowed
Strict will not allow your students to reschedule for a session in the same set (Ex. - Student wants to reschedule for session 3 in the set his/she is currently in) - the student will only be able reschedule for that session in a different set (Ex. - Student can only reschedule for session 3 in a different set)
The strict option is best for when it is mandatory that a student is present to learn the information for his/her course.
Flexible will allow your students to reschedule for any session in a different set (Ex. - Student plans to miss session 3 in his/her current set, but wants to take the next session, session 4, in a different set)
The flexible option is best for when it is not mandatory that a student is present to learn the information for his/her course.
Not Allowed prohibits students from rescheduling for a session at all (Ex. - Student misses session 5, but he/she cannot reschedule to take the session)
Below, I've created the "(CNA) Certified Nursing Assistant Certification Course" using the strict rescheduling option because it is imperative that students are present for class lectures and labs so that they will know what they're looking for when speaking with patients, how to document information, and how to properly care for patients upon completing their certification. I'm sure that no one wants to be under the care and supervision of someone who doesn't properly understand their role. And lastly, before we move forward, I've also set my course to have 16 sessions lasting 4 hours per session.

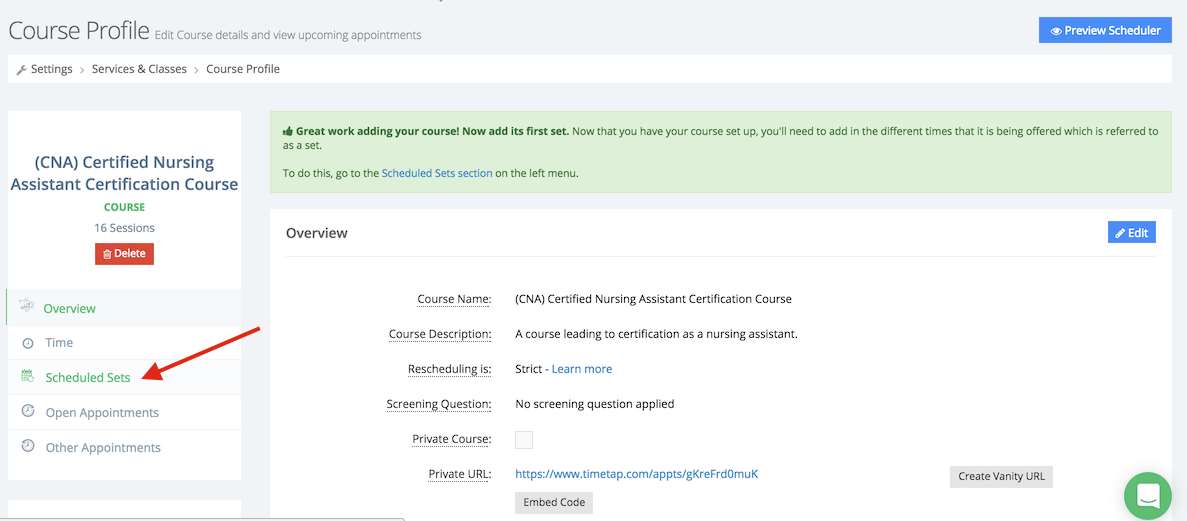
3. Click "Save Course" and then click the "Scheduled Sets Section"

4. Click the "Add New Set" button and then begin filling in/selecting the following details about the set:

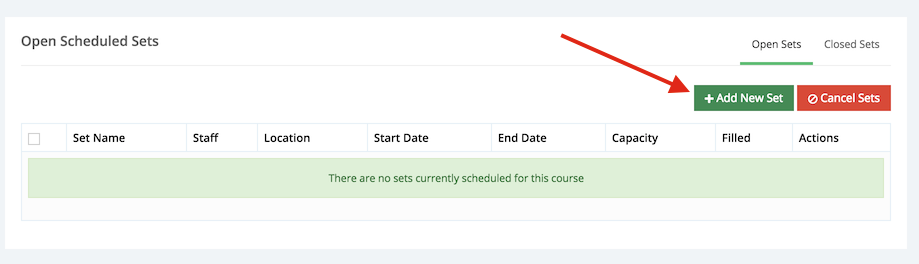
Click the "Add New Set" button
- Set name
- Staff
- Location
- Resource (a shared item/location between more than 1 staff member)
- Capacity
- Fill In Session Dates* (see notes below)
*Notes: You can decide whether you'd like to individually fill in your session dates or to have them automatically populate on a repeating basis. If you would like for them to populate on a repeating basis, you'll need to choose:
- the repeating frequency (weekly or monthly)
- how many weeks the sessions will repeat (every week, every 2 weeks, etc.)
- the days of the week for the sessions
- the date they will start on
- the start time for each session
Here, I've created a set called "Spring 2017 Certification (MWF 10:00am - 2:00pm)". I've chosen to have the sessions fill in on a repeating basis each week.

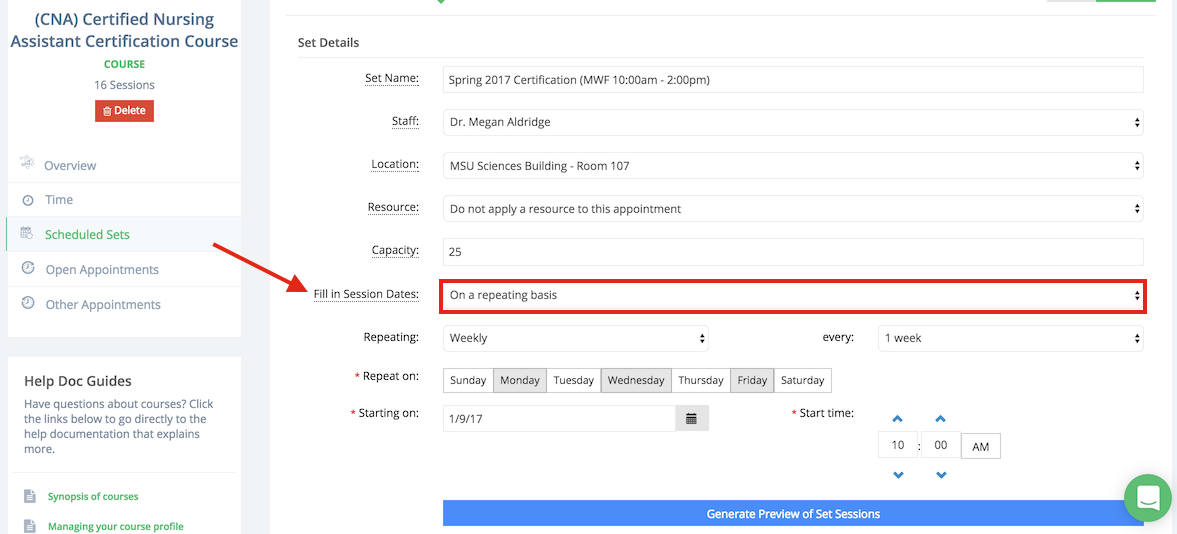
Once I'm satisfied with how everything looks, I'm going to click the "Generate Preview of Set Sessions" button so that I can see each session populated.

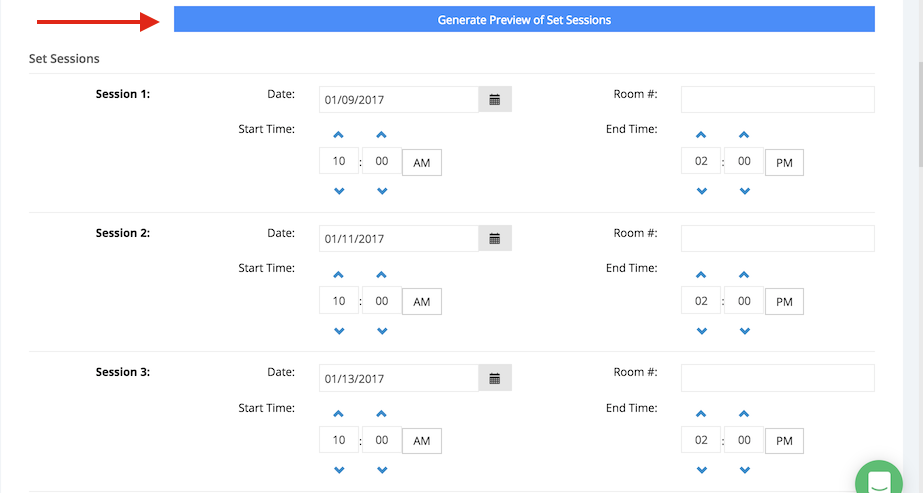
Click the "Generate Preview of Set Sessions" to see each session automatically populate for your set
5. Click the "Save Set" button
6. We're good to go!
Students can now sign up for the CNA Certified Nursing Assistant Certification Course and choose the Spring 2017 Certification set that I have created when they visit MSU's online scheduler. Click each of the images below to see a progression of how this would appear to students:

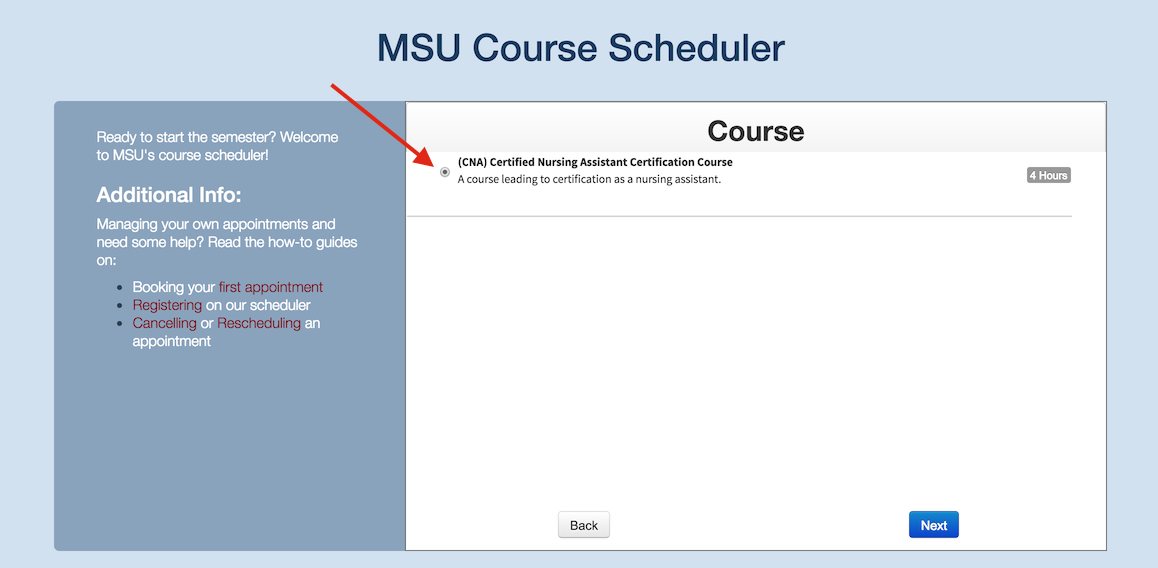
They'll then go on to fill in their information and confirm the booking.
If you'd like to try a walkthrough for booking this course, feel free to below:
Are you excited about helping your clients or students break the mold with this new feature? If you're ready to get started and have never signed up for an account with us before, you can sign up for a free 30 day trial of TimeTap Business. If you currently hold an account with us, by upgrading to TimeTap Business you can start using this feature and its options today.
Check out this walkthrough and others on our Youtube channel to help you optimize your clients' & students' online scheduling experience. For now, happy booking!